BURKE
09.22.2020
09.22.2020
Stock images and photo libraries are an excellent marketing tool for brands to use in their marketing materials. Not every organization has constant access to a well equipped photo team to regularly update their custom images, but with resources like Getty Images and iStock, you can have endless high-quality photos at your disposal. Additionally, these resources have allowed brands to make their marketing messages more inclusive and representative, with a variety of images that can help capture the diversity of their audiences.
However, with COVID-19 impacting nearly every aspect of our daily lives in some form, stock images are no exception. There’s a lack of materials available that show safe, socially distant work and recreational activities, or images of people doing any number of routine tasks while wearing a mask. To not let any of your image archive go to waste, it’s beneficial that your team has the skill set to update these images properly.
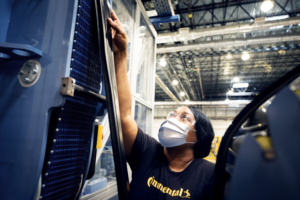
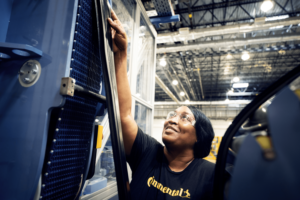
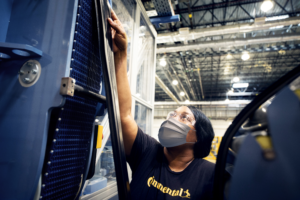
Recently, Continental Tires asked us to go through this process with one of their photos of a staff member working, updated to realistically look as if she’s wearing a mask in the shot. We used a combination of 3D rendering and 2D compositing to get the best results, and you can follow how we did it step by step!
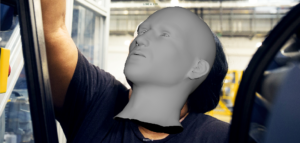
To start off we imported a 3D model of a surgical mask into Autodesk Maya, which is a 3D modeling software. We also imported a generic head model to help us visualize the mask placement, as well as the photo itself for reference.
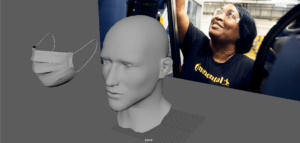
We rotated the head to match up with the factory worker’s head orientation from a front perspective.

Next we fit the mask model onto the head model.
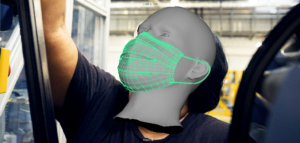
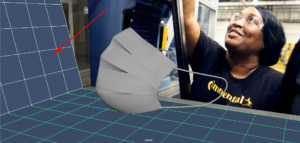
Once it fit nicely, we removed the head model so that only the photo was behind the mask. Then we tweaked the mask model to better fit the face of the worker.
Once the placement of the mask fit onto the worker, we switched over to adding lights around the mask to simulate the lighting in the real factory. The first light we added was a 360 degree HDR spherical light, which takes lighting data from a 360 photo and applies it to the mask model.
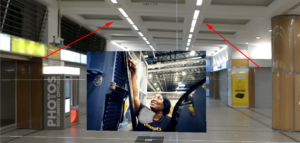
The 360 photo we used was chosen because it was similar to the overhead lighting seen in the factory photo. Afterwards, we placed several spotlights in the scene above the mask, at roughly the locations they would be in the actual factory.

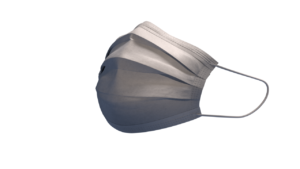
Finally, we added blue planes underneath the mask which would simulate bounce lighting to fill in some of the shadows.
The blue planes were meant to mimic the blue metal machines that can be seen in the actual photo, which would give some natural reflections of light. Once the scene was set up, the mask itself was rendered which can be seen here
Now to put the mask into the photo. Switching over to Photoshop, we imported the photo and the mask on top of it.
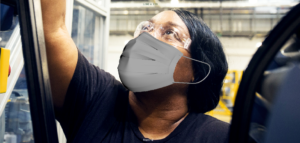
As you can see, it doesn’t quite look right. The mask, even though it’s a white material, is too dark for the scene. This was an intentional step however, as we wanted to render the mask clearly with none of the white areas blown out. With Photoshop, we could easily adjust the highlights and contrast levels of the white values to recreate the same brightness as nearby objects in the photo.
And voila! Enjoy your updated, socially relevant photo magic.